Getting Performance Ready – Drum Maintenance

Before any performance, a clean and well-maintained drum kit not only looks better but plays more responsively. This guide sets out a simple, structured approach to preparing the drums and hardware.

Correct cleaning order

1. Drum Shells
2. Chrome (lugs, hoops)
3. Stands & pedals
4. Cymbals (cleaned – not polished)

Cloths

Drum shells

  1. Wet
  2. Dry

Metal

  1. Polish
  2. Buffing

WD-40 should be used sparingly as a cleaner only. It should not be applied directly to the kit or used as a long-term lubricant.
This avoids overuse, messy kits and long-term issues

Toolkit

  • Microfibre cloths
  • Spray bottles (for diluted soap)
  • Autosol Chrome Cleaner
  • WD-40
  • Cymbal cleaner (Meinl or similar)
  • Very fine wire wool
  • Aluminium foil
  • Old towels for work surface.
  • Lubricants
    • Sewing machine oil
    • Lithium grease

Drum spares

felts, washers, bolts etc

Digital kit extras
  • Electronic drum cleaner
  • Compressed air can (for module & ports)

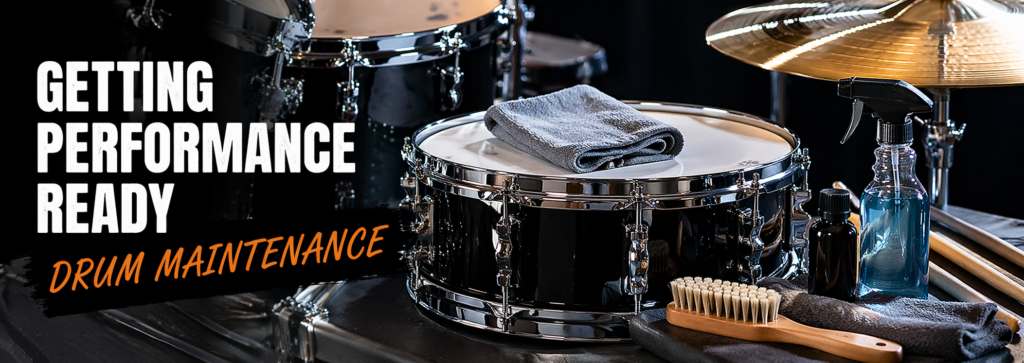
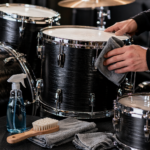
Cleaning Drum Shells

Materials

  • Old towel
  • 2 Micro-fibre cloths one wet, one dry
  • Spray with very diluted soapy water

Instructions

  • Begin by placing the drum on a soft towel to avoid scratching the shell and to protect the work surface.
  • Using a dry microfibre cloth, remove all loose dust and dirt from the surface, paying attention to edges and around lugs.
  • Prepare a very mild cleaning solution using a small amount of dish soap diluted in water. Lightly dampen a clean cloth and wipe the shell gently, working in straight lines rather than circles. Avoid soaking the cloth
  • Dry immediately with a second cloth.
    * For wrapped finishes, a dry buff is usually sufficient.
    * For lacquered shells, apply a small amount of guitar polish or carnauba wax and buff lightly to restore depth and shine.
  • Take care not to allow moisture to sit around hardware fittings. The aim is to clean and lift dirt without disturbing the finish.
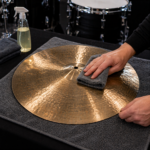
Chrome Hardware: Hoops, Lugs and Fittings

The aim is to remove corrosion without damaging the chrome surface.

Materials

  • 2 microfibre cloths
  • toothbrush

Instructions

  • Start by removing surface dust with a dry cloth, use a toothbrush along rim edges and lugs. Apply a small amount of metal polish such as Autosol to a microfibre cloth and work it gently into the chrome.
  • Use WD-40 on stubborn grime and screw threads such as cymbal stands. Do not spray on directly. Spray on to a cloth.
  • For light rust or dull areas, polish in small sections and buff clean. Where rust spots are visible, use ultra-fine 0000 steel wool with very light pressure, working only enough to lift the rust. The motion should feel like polishing, not scrubbing.
  • Wipe clean and inspect the surface. Repeat only where necessary. If pitting is present, focus on removing loose rust rather than attempting to restore the chrome fully. See note below.
  • Finish with a clean cloth to bring back a consistent shine. The goal is a clean, stable surface rather than a perfect mirror finish.

Notes

Heavily Rusted or Pitted Chrome

Clean the surface with metal polish to remove general residue and reveal the extent of corrosion. Where rust has penetrated the chrome, work gently with ultra-fine steel wool or aluminium foil to remove loose oxidation.
Do not attempt to remove pitting. Instead, focus on stabilising the surface by removing active rust and cleaning the surrounding chrome.
Wipe clean and apply a light protective layer of oil or wax. The surface will remain marked but should appear cleaner and remain stable.
This process is intended to preserve and maintain rather than restore the original finish.

Stands And Pedals

Instructions

  • Lay out the hardware and wipe down all surfaces with a damp cloth to remove accumulated grime. Use a small brush to clean around joints, threads and fittings where residue collects.
  • Apply metal polish where required and buff dry. Introduce a very small amount of light oil to moving parts such as pedal hinges and hi-hat mechanisms, working the action to distribute it evenly.
  • Apply a small amount of grease to threaded areas if needed, ensuring any excess is removed. All components should feel clean, smooth and responsive without residue.

Cymbals

The aim is to clean without stripping natural patina. Over polishing changes the tone of the cymbals

Instructions

  • Rinse the cymbal with warm water to remove surface residue, including fingerprints, dust and stick marks. Apply a small amount of dedicated cymbal cleaner and spread it with a soft cloth.
  • Work along the natural grooves of the cymbal, moving from the centre outward. For more stubborn residue, use a soft brush lightly within the grooves, maintaining the same direction.
  • Rinse thoroughly and dry immediately with a clean cloth. Avoid over-cleaning, as natural oxidation contributes to the cymbal’s character and tone.
  • The aim is to remove surface residue while preserving the integrity of the metal.

Electronic Drum Kit

Instructions

  • Ensure the kit is powered off and unplugged. Remove dust from pads, rack and module surfaces using a dry microfibre cloth.
  • Where necessary, use a lightly dampened cloth to clean pads, taking care to avoid excess moisture. Mesh heads and rubber surfaces should be wiped gently and dried immediately.
  • Clean the module screen with a suitable screen cleaner or a barely damp cloth, avoiding direct application of liquid. Use cotton buds for detailed areas and connections.
  • Allow all components to dry fully before reconnecting power. Cleaning should remain controlled and minimal to protect electronic components.

Performance check (after cleaning and reassembly)

Once the kit has been cleaned, reassemble all components carefully, ensuring that each drum and stand is correctly positioned and securely fitted.

If and drums have been dismantled, check that all lugs, hoops and fittings are properly seated and that tension rods turn smoothly.

Tune each drum as required, ensuring even tension across the head and a consistent response.

Set up the stands and pedals, confirming that all joints are secure and that height and positioning are comfortable for playing. Cymbals should be correctly mounted with appropriate spacing and free movement.

Test all moving parts, including pedal action and hi-hat response, ensuring they operate smoothly without noise or resistance. Make any small adjustments to alignment or tension as needed.

Finally, play the kit to confirm that everything feels balanced and responsive. The drums should be stable, the hardware secure, and the overall setup ready for reliable performance.

Scroll to Top